
Tactical Map
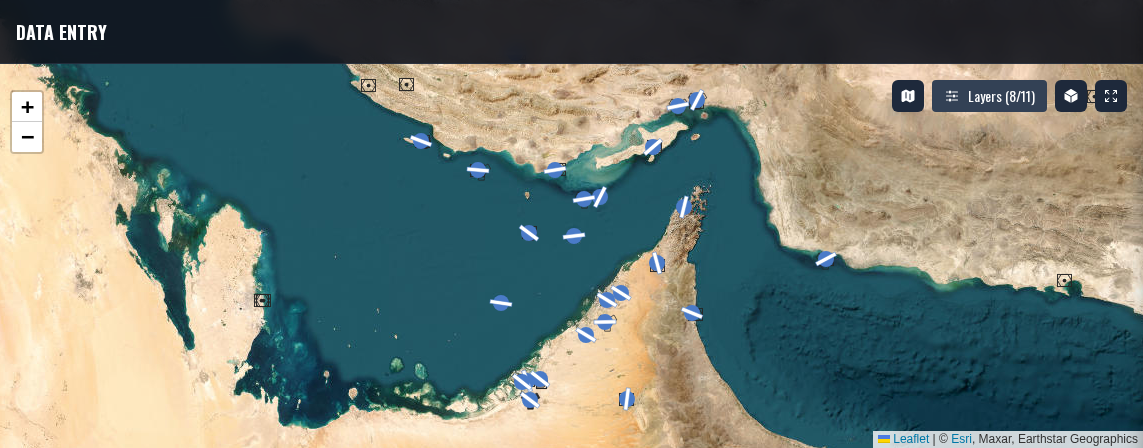
The tactical map at the top of the editor is more than a preview — it's the primary way to build routes, place waypoints, and interact with threats, targets, and overlays.
Theaters
The map follows the theater of your design. Supported theaters are Afghanistan, Caucasus, Iraq, Kola, Marianas, Nevada, Persian Gulf, South Atlantic, Sinai, Syria, CW Germany, Normandy, and The Channel. Change the theater from the design's Settings dialog. When you switch theaters the map recenters and reloads theater-specific tilesets and overlays.
Map Interactions
| Action | Behavior |
|---|---|
| Ctrl / Cmd + Click | Add a new waypoint at the clicked location |
| Drag a waypoint marker | Reposition the waypoint |
| Shift + Drag a marker | Reposition it and snap to the nearest waypoint, target, threat, airfield, or graphic vertex |
| Right-click a waypoint marker | Context menu with per-waypoint actions (see below) |
| Right-click empty map | Context menu to add waypoints, threats, targets, support assets, and more |
| Alt + Click | Enter measure mode |
| Scroll | Zoom in/out |
Measuring
Alt + Click once anywhere on the map to start measuring. Move the mouse (no need to hold a button) and the distance and bearing from the start point update live. Click again to finish, or press Esc to cancel.
Distances read in nautical miles by default — click the distance readout in the map's bottom-left corner while measuring to switch between nm and km. Your choice is remembered and applies to every map.
Waypoint Right-Click Menu
Right-clicking a waypoint marker opens an actions menu containing (in order):
- Select from locations... — Snap to an airfield or named point from the location library.
- Reposition relative to... — Set the waypoint by bearing/distance from another point.
- Configure popup attack... — Open the popup attack modal. Available on any waypoint other than the first, regardless of aircraft.
- Calculate Viewshed — Compute line-of-sight from this point across the terrain.
- Copy Coordinates — Copy the waypoint coordinates to the clipboard in the current format.
- Advanced options... — Per-waypoint overrides (altitude, IAS, TOT holds, etc).
- Unpin waypoint — If the waypoint is pinned to a preset point / theater location, unpin it so it's freely movable.
- Delete waypoint N — Remove this waypoint from the flight plan. The label includes the actual waypoint number.
Empty-Map Right-Click Menu
Right-clicking anywhere on the map outside a marker opens a context menu for adding entities at the clicked point. Depending on the current tab and state, it includes:
- Add Waypoint — Add a new flight plan waypoint.
- Add Target — Add an OPFOR target point.
- Add Threat — Submenu listing every threat type (SAM classes, AAA, MANPADS, etc).
- Add Ground Unit — Add a generic ground unit marker.
- Add Friendly AD — Add a friendly air defense asset.
- Place Tanker / Place AWACS / Place Carrier — Submenus for support asset variants.
- Add Control Point — Submenu for General / Friendly / Enemy control measure points.
- Add Track Point / Add Track — For support track editing.
- Add DPI At Point — When editing DMPIs.
- Calculate Viewshed / Clear Viewshed — Terrain line-of-sight computation at the clicked point.
- Add Blue Bullseye / Add Red Bullseye / Move Bullseye Here — Bullseye placement.
- Task Satellite — Schedule an async Keyhole reconnaissance pass of the area (when Keyhole is configured).
- Copy Coordinates — Copy the clicked coordinates in the current format.
The menu adapts to the current data tab — e.g. threat-adding items appear in OpFor mode, control points in Control Measures mode. Items you don't need for the current task are hidden.
Layers
Click the Layers button in the top-right of the map to toggle individual map layers. The available layers are:
- Waypoints — Flight plan markers and leg lines.
- Doghouses — Navigation data boxes at leg midpoints.
- Threats — Threat markers from OPFOR / theater overlays.
- Targets — Target markers.
- Threat Rings — Engagement range rings around threats.
- Viewsheds — Line-of-sight polygons.
- Range Plan — Range/training area waypoints.
- Control Measures — Battle positions, FARPs, checkpoints (Apache/Kiowa).
- Graphics — Battlefield graphics drawn in the design (lines, areas, air corridors, labels).
- Support — Tanker, AWACS, and carrier tracks.
- Airports — Airfield markers.
- Package Flights — Waypoints of other flights in the same package (only shown when you're editing a package flight).
- Drawings — Drawings from theater overlays and the Drawing Tool (polygons, lines, text labels). Distinct from Graphics, which are the battlefield graphics (air corridors, areas) drawn in the design itself.
Layers that are the focus of the current data tab (e.g. Waypoints while on the Flight Plan tab) are shown checked but disabled — they can't be turned off while you're editing them.
Tilesets
The base layer is satellite imagery. If your squadron has a Mapbox API key configured (see Squadron Settings), the map uses high-resolution Mapbox satellite tiles. Otherwise the same satellite tileset is served from the default free provider.
Beyond satellite, some theaters also ship with DCS-accurate chart tilesets and VFR charts — not every theater has both, so what's available in the tileset picker depends on the theater you're working in.
Popup Attack
The popup attack modal is reachable by right-clicking any waypoint other than the first and selecting Configure popup attack.... It's available regardless of which aircraft is selected — popup attack is a tactical planning aid rather than an aircraft-specific feature. The modal computes an IP-to-target attack profile including dive angle, release altitude, and pull-off geometry.
Viewshed
Viewshed overlays compute line-of-sight from a point outward across the terrain. The shaded area is what the observer cannot see at the configured ingress altitude — i.e. the terrain-masked ground you could fly through without being exposed.
There are two flavors of map viewshed: ephemeral (a scratch overlay you trigger from a point) and threat/target (a persistent overlay pinned to a specific threat or target entity).
These map viewsheds belong to the design you're editing. For a standalone what-if surface that doesn't belong to any design, use the dedicated Viewshed Tool.
Ephemeral Viewshed
Ephemeral viewsheds are the fastest way to spot-check line of sight. They exist only while the overlay is visible — nothing is saved to the design.
Three ways to start one:
- Empty-map right-click → Calculate Viewshed — Places the observer at the clicked point.
- Waypoint right-click → Calculate Viewshed — Places the observer at that waypoint's position.
- Viewshed Settings panel → Move — Once an overlay is up, click Move and then click somewhere on the map to reposition without losing your settings.
While an ephemeral overlay is active, the Viewshed Settings panel appears on the right side of the map. It has:
- Radar Height — Height of the "observer" (SAM/radar) antenna above the ground, in feet. Defaults to 20 ft.
- Ingress AGL — Aircraft altitude above ground level. Defaults to 500 ft, slider goes 0–10,000 ft.
- MSL — Checkbox plus a paired field to override the AGL check with an absolute altitude. The minimum allowed value is clamped to just above the radar's site elevation (shown under the slider).
- Grid Quality — Resolution of the underlying sample grid. Options are Standard (360), Dense (720), and Hi-Res (1000). Higher quality produces a crisper shadow at the cost of calculation time.
- Move — Arm the map for a one-click reposition (see above).
- Close (✕) — Clears the overlay and closes the panel.
You can also clear an ephemeral overlay from empty-map right-click → Clear Viewshed.
Threat & Target Viewshed
Threats and targets can carry their own viewshed configuration that persists with the design. A pinned threat viewshed renders every time that threat is on the map, so you can keep a whole SAM belt's shadow visible without recalculating it.
Right-click a threat or target marker:
- Show Viewshed / Hide Viewshed — Toggle the persistent overlay for that threat/target. Defaults to 20 ft radar height, 500 ft ingress AGL.
- Edit Viewshed... — Only appears when the viewshed is shown. Opens the same-style settings panel with an extra Color picker (Black, Red, Blue, Orange, Purple, or a custom color) and a Sync Ingress to All Viewsheds button that copies this viewshed's ingress AGL / MSL settings across every other threat and target viewshed in the design.
Color lets you distinguish overlapping SAM shadows at a glance — e.g. red for modern SAMs and purple for strategic systems.
Showing Viewsheds on Kneeboards
The Viewsheds layer in the map Layers panel controls whether any viewshed overlays render — both ephemeral and pinned. Toggle it off if you want to see the underlying map or threat rings without the shadow fill.
Keyhole Satellite Tasking
If Keyhole is configured for your squadron, right-click any empty point on the map and pick Task Satellite to schedule an asynchronous reconnaissance pass. Results come back as a higher-resolution snapshot of the area you tasked.